
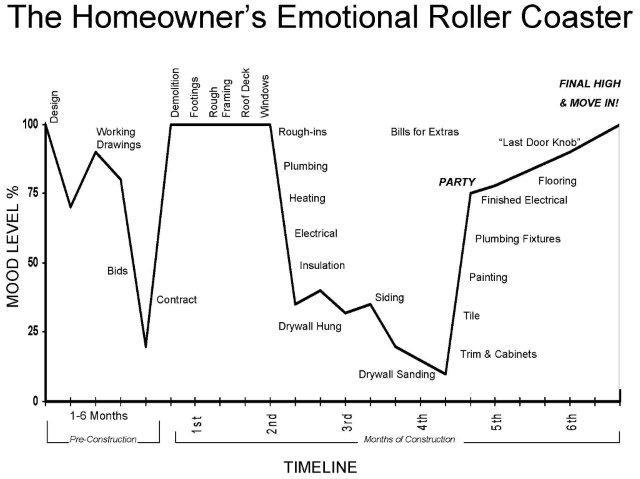
Excessive dust is probably the most common customer complaint encountered during a typical home or commercial remodeling project. Dust reaches every nook and cranny so anything that can be done to contain it while cutting lumber or sanding drywall will help reduce anxiety. As can be seen in this chart, the point during a major construction project where the customer mood level is lowest when the dust levels are at their maximum, which is usually at the drywall sanding stage.
We used to purchase rolled plastic and use masking tape to contain the dust. That worked to a point, but the plastic was always falling, and the tape would sometimes leave residue on the ceiling or take paint off. It wasn’t an optimal system, but it was all we had. Then about 10 years ago we stumbled upon a ZipWall product booth at a remodeling convention in Chicago and watched a demonstration of the product http://www.zipwall.com/ . Immediately we saw the potential. Since then our collection of ZipWall poles has grown from a single set of 4 to more than 20 over the years. They can often be found at multiple work sites.
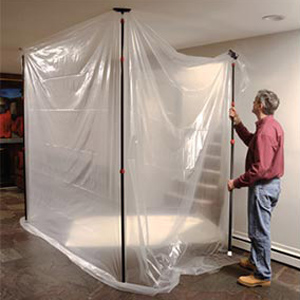
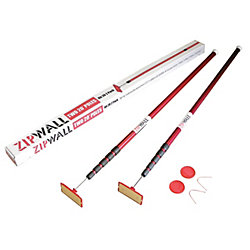
The ZipWall system is composed of a set of spring loaded telescoping aluminum poles with a rubber pad at the top and bottom that holds your rolled plastic sheeting (sold separately) tightly to the ceiling and floor without the use of tape. The poles are easy to use and one person can usually wall off a room in about 10 minutes.
Our most frequent usage has been to set up small areas within a room to contain dust while repairing large ceiling or wall holes. They are also great for isolating a room that has a lot of wood cutting or demolition taking place . ZipWall sells an optional “zipper” that installs on your plastic sheeting but we have found that the zippers are expensive and don’t work well. A cut flap on one of the side “walls” works better for entering and exiting the sealed area. Unfortunately, that is also the source of any dust release from the area so it is best to attach another piece of rolled plastic over the flap to act as a door. Use masking tape to seal the top of the additional piece over the flap. Do not apply tape to the side or bottom of the additional piece as it becomes difficult to enter the “walled” area.
After using the ZipWall system for awhile, we started coming up with other uses for it. On several occasions we found that we could set up a wet saw in a customer’s finished living room. It sure beats walking a long distance or working out in the freezing cold to cut a tile . The ZipWall space can contain all of the dust and water. We simply place plastic sheeting on the floor with a drop cloth over it to prevent slippage. Clean up is a snap.
One time we set up the system at a local college. The poles were placed on top of A-frame ladders to create a huge tented area (20’ high x 30’ wide) for an Artist to work on a large wall mounted art project. The other Artists were envious of the lack of cleaning needed after the project was complete.
In our Workshop, we have a Spray Booth set up using the ZipWall system. Since it is so easy to set up and tear down, we can utilize the space either for construction of cabinets or the finishing of them, depending upon how much space is needed for each phase. The ZipWall system prevents the sawdust created during the woodworking phase from reaching the items being painted, stained, or clear coated.
Since the Environmental Protection Agency’s RRP rule went into affect a few years ago, we have seen many other uses for the ZipWall system including quick set up to contain lead paint chips during replacement window or door installations. The system also works to contain harmful lead debris during other home remodeling projects as well.
They really are very handy. No longer just for Contractors, the Home Depot has recently made them available to the Do-It-Yourself Homeowner too.